
Just a couple of weeks back, Tetsu Kasuya, the 2016 World Brewers Cup Campion, showed off his new recipe for the Hario Switch Brewer on his YouTube channel. He was so excited about it that I had to give it a try.
The recipe is very simple yet unique. It was quite a surprising method, and it completely goes against how we typically use the Hario Switch. But it’s supposed to produce a sweet and clear cup with a very easy to follow procedure.
Let’s find out if it’s as good as it sounds!
What is the Hario Switch?
Let me start off with a quick intro to the Hario Switch brewer.
It as an immersion style dripper from Hario, the makers of the famous V60s.
Immersion brewing?
Typical pour-overs are what are called percolation brewing. Hot water passes through a bed of coffee grounds, and the coffee gets extracted.
Immersion brewing on the other hand is where extraction happens while the hot water and coffee grounds sit around together. The grounds are immersed in the water, hence the name. A french press is a classic example.
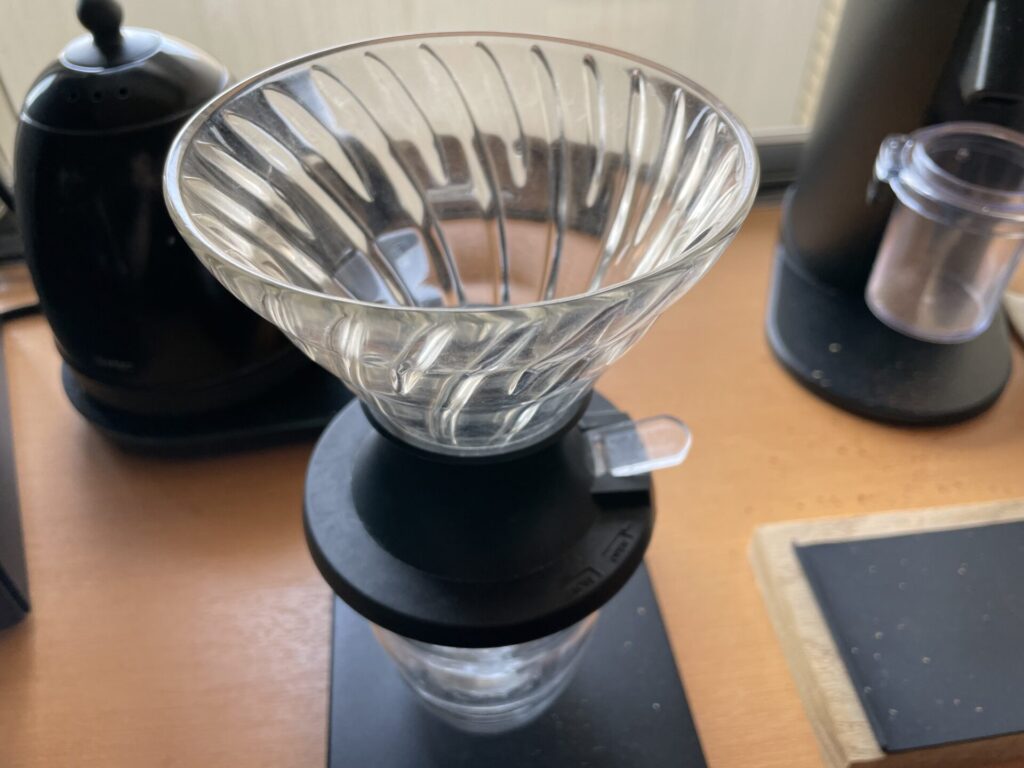
The Hario Switch is pour-over dripper that can take advantage of immersion brewing.
Its cone part is shaped exactly like the V60s. What differentiates it is a small steel ball at the hole of the dripper. By turning a switch on or off, you can stop the flow of water at the exit.
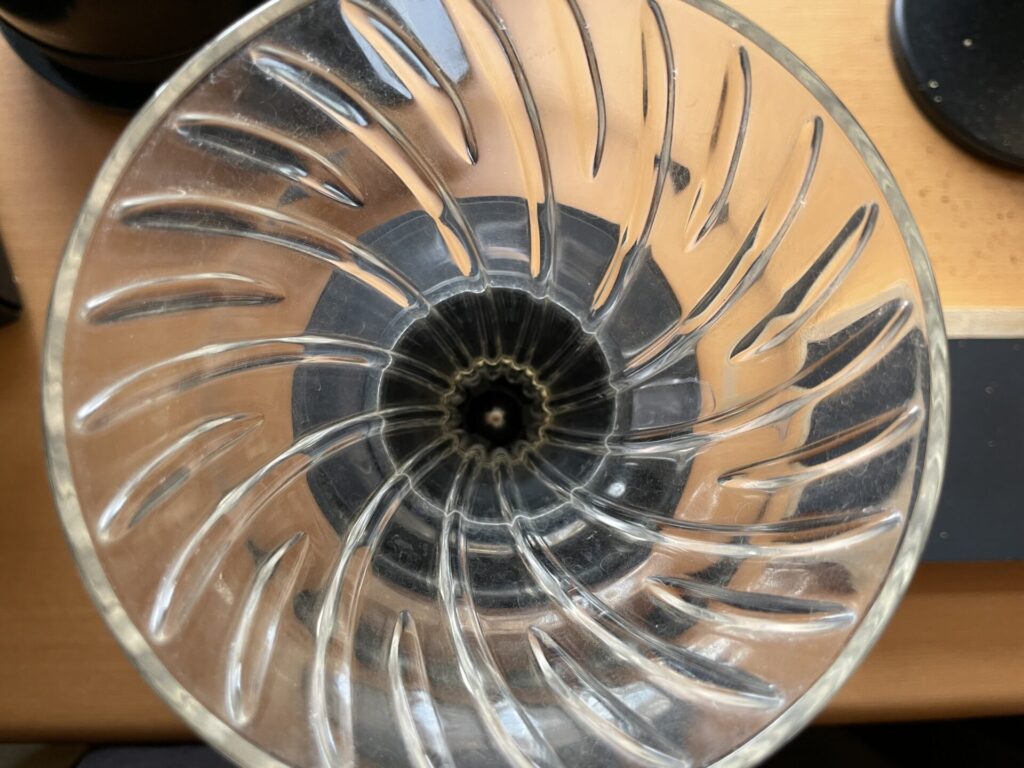
It might be a bit hard to see in the photo but right at the center you can see the ball. The switch lifts or drop the ball to allow or stop water falling. I did a detailed review in this post if you are interested.
The typical way you would use this brewer would be to; close the exit and pour water on the coffee bed, this will let the grounds immerse in the water. After a few minutes, the exit will be opened to let the extracted coffee fall.
I am a real fan of this dripper and have been using it as my daily driver for the good part of this past 2 years.
It cannot be easier to brew. Just pour water in, wait and let it fall. Immersion brewing is a very forgiving method in terms of technique, so you can get really consistent results.
Tetsu’s Recipe
Again, Tetsu Kasuya is a famous brewer who won the 2016 World Brewers Cup. You may know him from his 4:6 method for the V60. (His website)
A recipe by this pro V60 brewer, has to be interesting.
This is the video in which he explains the method. His enthusiasm and excitement for the recipe really comes across. You must go watch it. (Way better then reading my post)
I hope you did go watch the video, but let me quickly sum up the recipe.
詳しくはぜひ動画の方ごらんいただきたいのですが、ざっくりと方法をこちらでも紹介させていただきます。
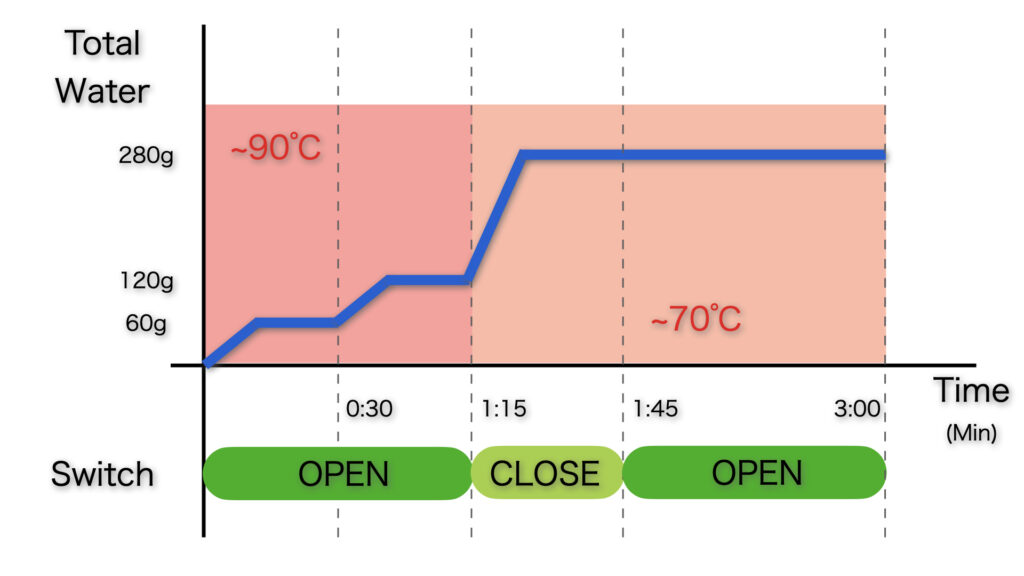
Ratio: 20g of coffee, to 280g of water
Method
- Open the switch (allowing water to pass). pour 60g of 90℃ water
- After 30sec, pour up to a total of 120g of 90℃ water
- Add cold water to your pot, to cool the water down to about 70℃
- At 1min 15sec, close the switch (stop the flow), and pour up to 280g 70℃ water
- At 1min 45sec, open the switch and let the coffee fall
- The draw down should end around 3min.
Graphically, it’s like this.
Again, go watch the video for a detailed explanation.
The fundamental idea of the recipe is that the good stuff from the coffee gets extracted at the beginning. The later part of the brew introduces undesirable parts, but it is still important for the texture of the entire cup.
So the recipe uses hot water at the beginning in percolation, to quickly extract the good stuff. Then it switches to immersion and a lower temperature to ease back on the extraction.
The recipe was inspiring in two ways. Keeping the switch open at first, and lowering the brew temp very low.
Keeping the switch open at first is kind of like defeating the purpose of the Hario Switch. I have heard people using the immersion for only the bloom phase (so only at the start), but really haven’t heard of the opposite before.
And a 70℃ brew temp, is well alarming to say the least. Never heard of such a low temp. The lowest I have heard is about 80℃ for very dark roasts. And changing the brew temp mid way through a brew is also unheard of.
But if you hear the idea behind the recipe, it does make sense.
Just simply amazing.
Trying it out
Let’s try it out.
I compared it to my usual recipe, which is probably a typical recipe for the Hario Switch. For details jump to this post
Ratio: 9g of coffee, to 150g of water
Method
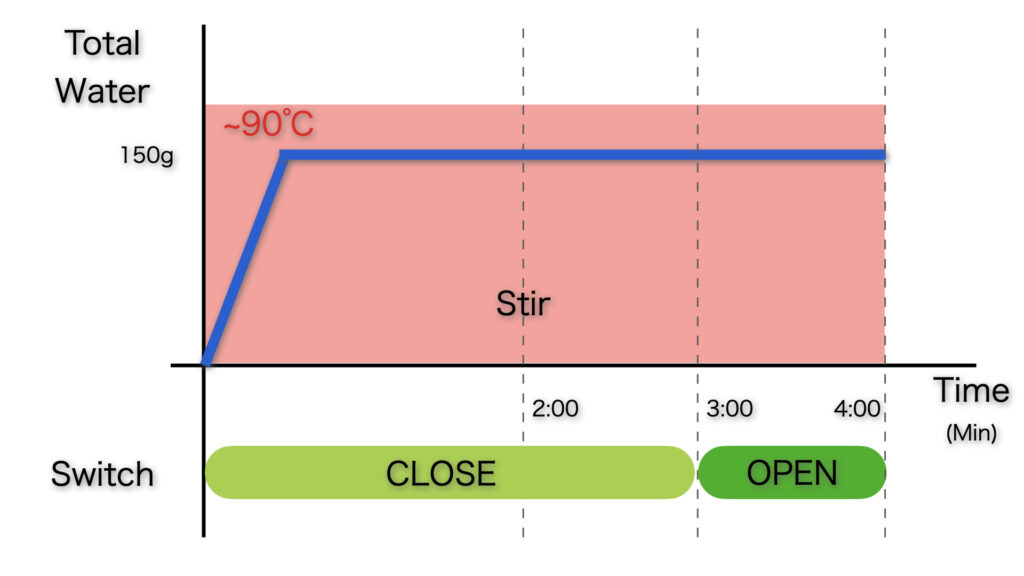
- Close the switch. Pour 150g of 90℃ water.
- At 2min, give the cone a gentle stir with a spoon (to knock off the grounds from the side of the cone)
- At 3min, open the switch.
- Draw down should end around 4min.
To represent it graphically,
So how did these two cups compare?
Tetsu’s recipe produced a very smooth cup with a clean after taste.
I personally this my usual method is pretty good (otherwise I wouldn’t be drinking it every day) but even so there is this slight dryness to the after taste. Tetsu’s got rid of this completely.
Also, Tetsu’s cup had a strong sweetness at the beginning and it feels more defined. It does not linger and passes though nicely.
I felt a definite difference.
To be honest, I was a bit worried that I raised my expectations too high, but it did not disappoint.
With a bit more practice it may get even better.
By that I mean, the recipe is presented as a very simple one, and compared to Tetsu’s other 4:6 method it definitely is.
But compared to my usual recipe, it is undeniably more complicated.
All things considered, it is definitely worth a try!
コメント