
Hi everyone!
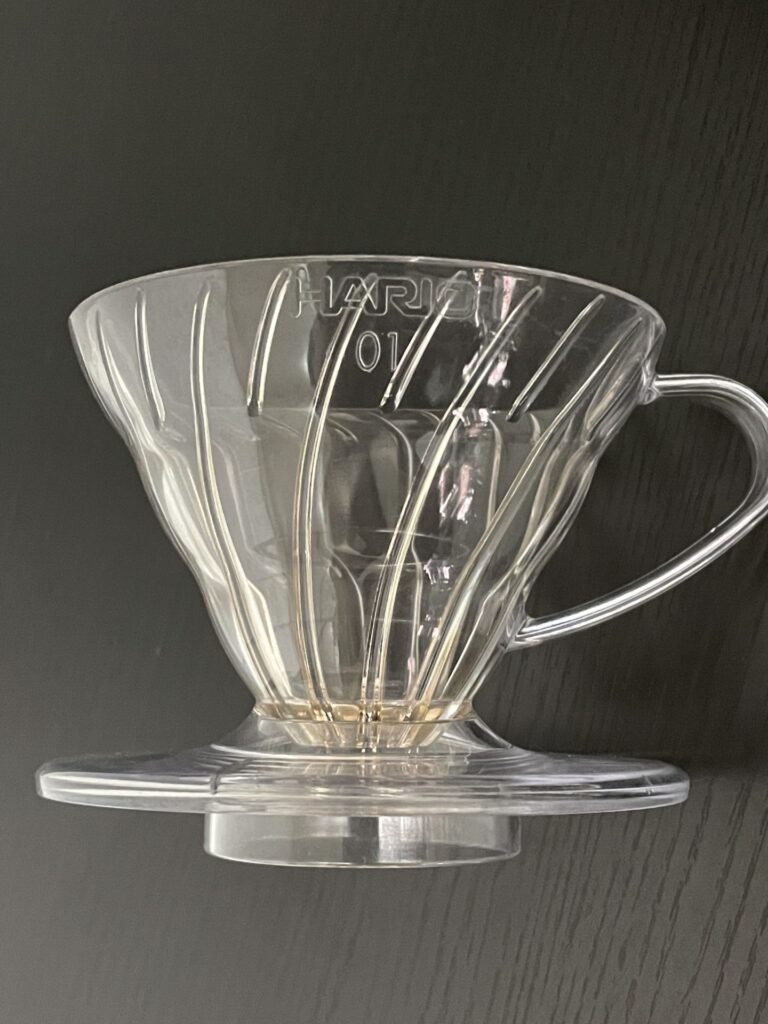
Which dripper do you like to use for your paper filter pour overs? For a lot of you the answer might be the world famous V60 dripper from HARIO. I am definitely one of them.
HARIO as you may know is a Japanese company, which started off producing glass equipment for chemical experimentations like beakers. Now they produce a wide range of glassware, kitchenware, etc… But the V60 is probably the most famous product to coffee enthusiasts.
The interesting thing about the V60 is that the technique or method of brewing you use greatly impacts the end result. So people have come up with countless ways of brewing with it.
So today I would like to try out 3 ways that I personally like to use.
- The James Hoffman Method
- The 4:6 Method by Tetsu Kasuya
- The Osmotic Flow Method (I like to call it the Japanese Dome Method)
But before we go into the individual methods, I want to emphasize that there is no one correct or best method. It would depend on factors like, the beans you use, and ultimately your preference. So use these 3 methods as a foundation to build your own method.
OK, with that note out of the way, let’s get brewing!
For the comparison today, I will be using 150g of water for each of the brews. Each method has a different recommendation for the ratio so I adjusted the weight of beans with this. The beans I used for the comparison were some single origin Mandheling coffee beans from HORIGUCHI COFFEE. (I did write a review in Japanese, but didn’t bother translating it to English since it doesn’t look like they offer oversea shipping. Here’s a link if you want to look at the pictures.)
The James Hoffman Method
If you have not heard, James Hoffman is a famous coffee YouTuber. He was the 2007 World Barista Champion and has done a lot of work in the coffee industry. I love his YouTube videos, and I probably have seen all of them. They are highly informative and entertaining thanks to James’ character. If you have not checked out his work, I highly recommend that you do here at his YouTube channel. You will most definitely lean a lot more by watching his videos, rather than reading my blog. haha.
James has developed his Ultimate V60 Technique which he explains in this video. Some key points about this method is that you don’t technically need a gooseneck kettle, and it is a very simple method which is easy to replicate.
The recommended base ratio is 100g to 6g. Of course he comments that this should be adjusted to taste. But today I stuck to the basics. I will brew with 150g of water so will weigh out 9g of coffee beans.
The grind size is a medium fine. It’s very difficult to explain grind size, but roughly about 1mm sized particles.
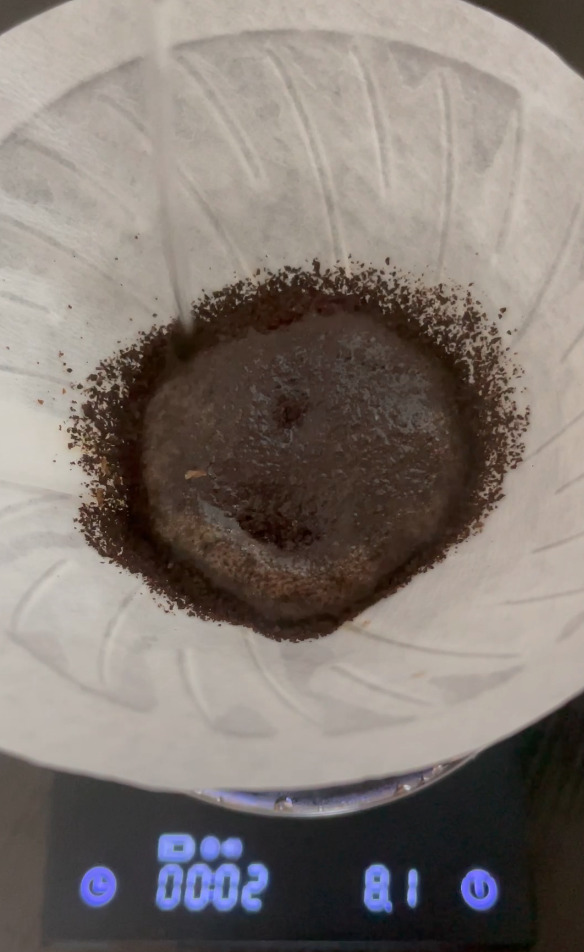
The first thing to do is to set your paper filter in the dripper, and rinse it with hot water. The purpose is to wash away some of the papery taste in the filter and to preheat the dripper. Make sure you throw away the rinse water before you start your actual brewing process. (I have forgotten to do this a couple of times in the past)

Then put the ground coffee beans in the cone, gently shake the dripper to flatten the coffee bed, then use your finger to poke a hole in the middle. This will help the water to contact all the coffee grounds in the next bloom phase.

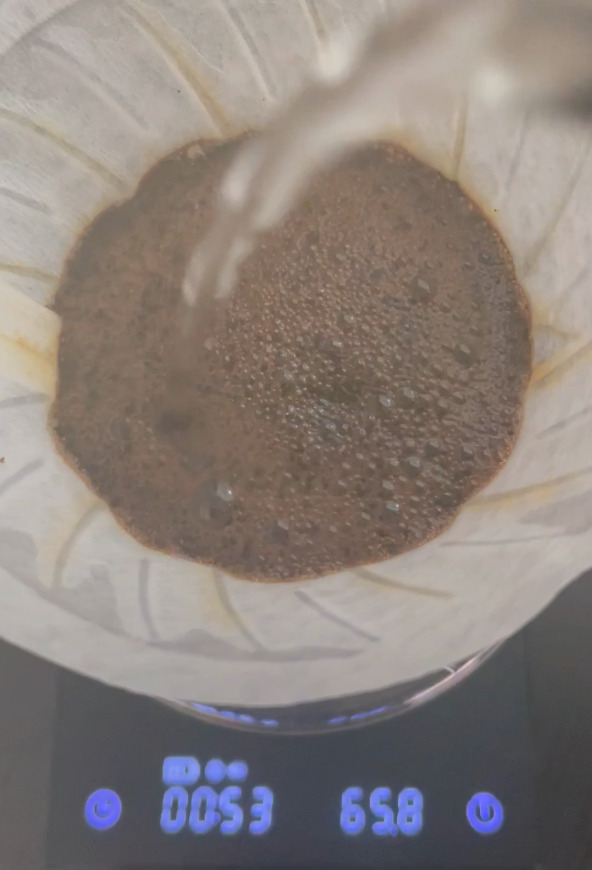
One your ready, zero your scale, start your timer, and start pouring. The water you use should be as hot as possible just off boil, especially if you are using light roasts. The heat will assist the extraction. If you are using darker roasts, you could use slightly cooler water.
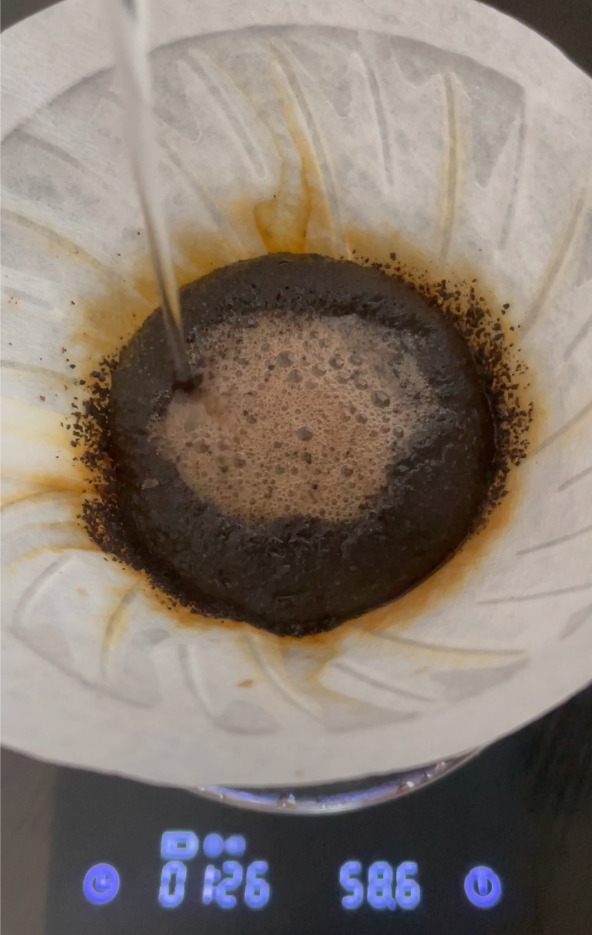
The first step is the bloom phase. Pour about double the weight of your coffee. I’m using 9g here, so roughly 18g.
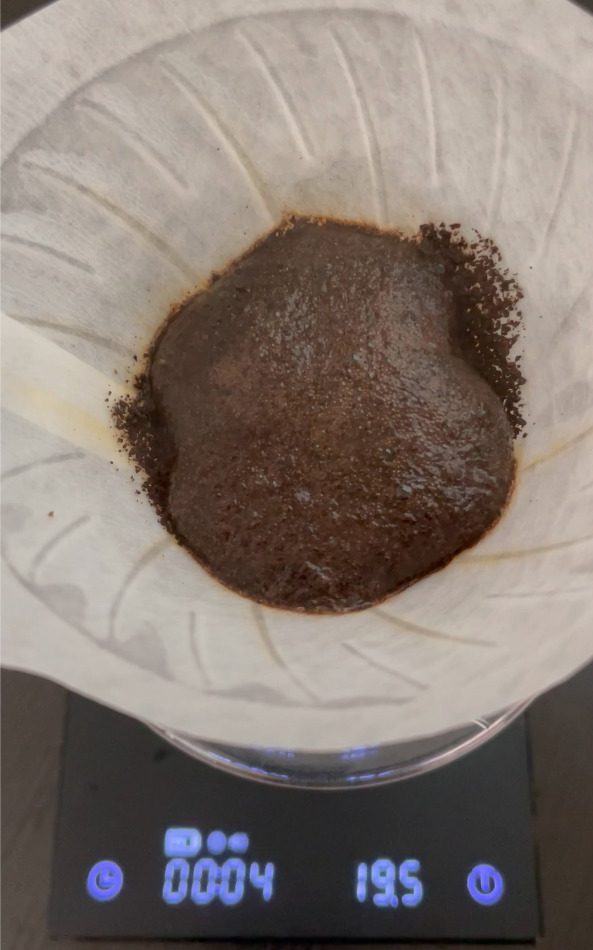
You want to pour so that all your grounds get wet. It’s not a lot of water, so you may have some dry spots. lift your dripper and swirl it so that you get a good mix.
This bloom phase is common to a lot of methods. Its purpose is to allow the grounds to release the CO2 which is produced during the roasting process and trapped in the beans. The fresher and darker roasted your beans, the more CO2 it will have and the more it will expand.
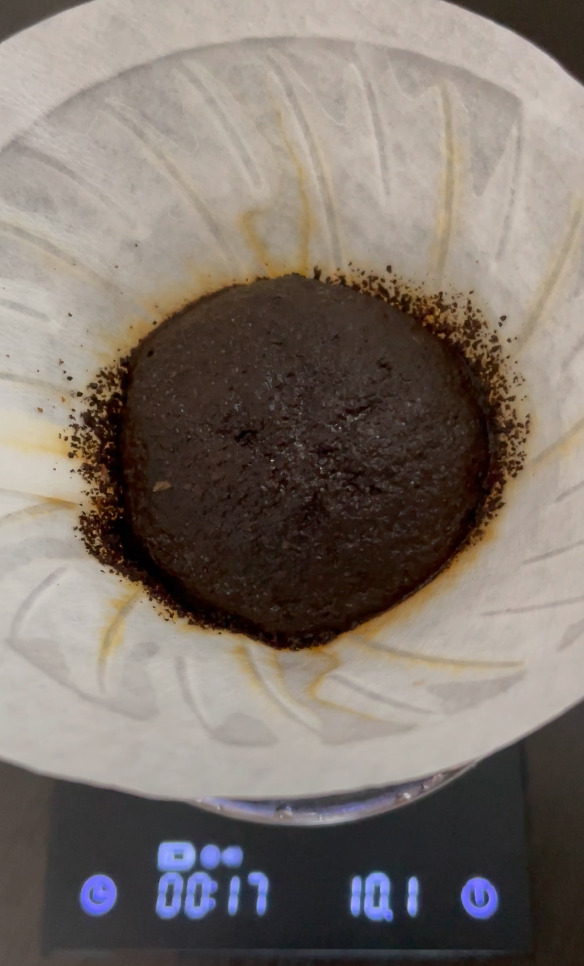
Wait about 45sec in this bloom phase.
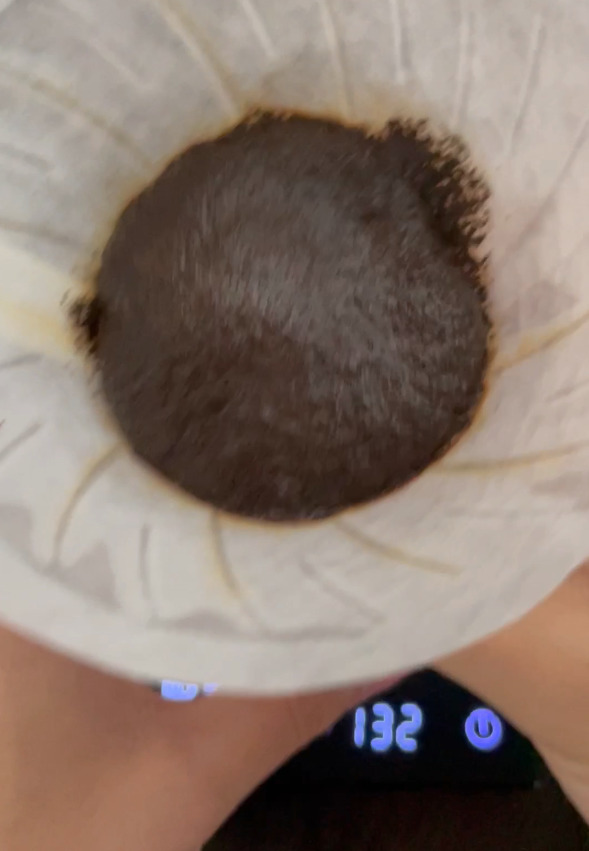
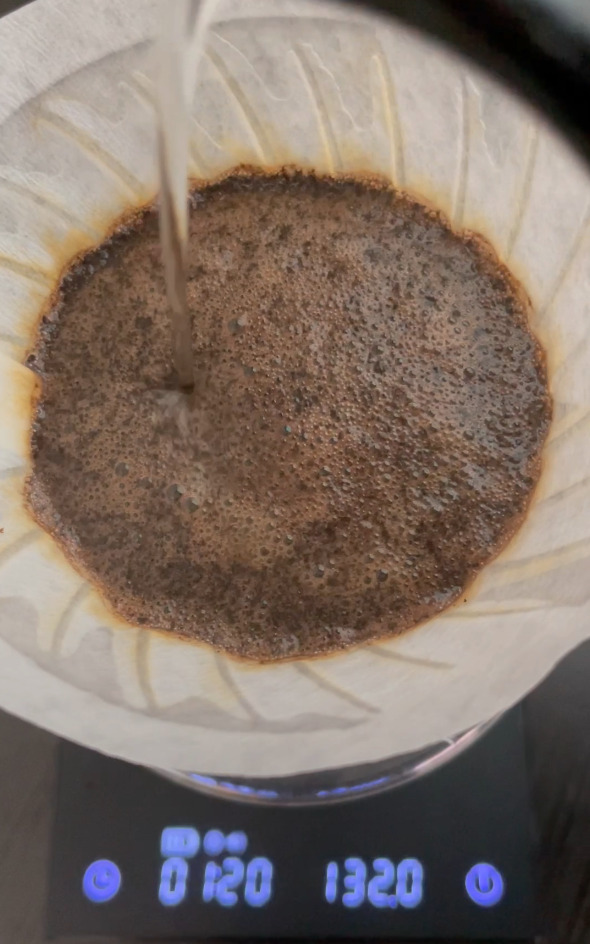
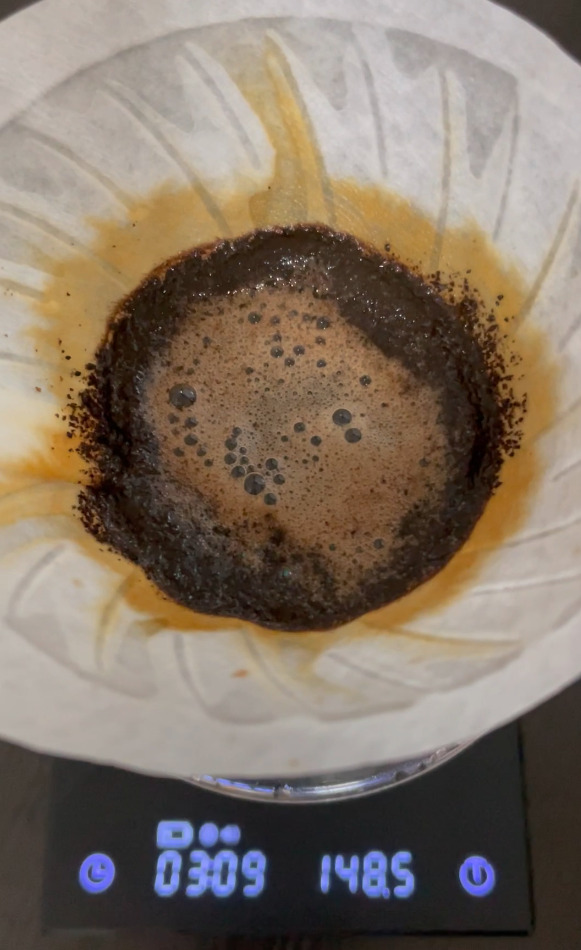
After waiting 45sec, start your next pour to about 60% your target weight by the 1min 15sec mark. For me with a target of 150g, this will be up to 90g. The grounds should get soaked in water.
Pour on top of the grounds, not too gently but not too vigorously. You need a bit of agitation in the coffee bed to get a good extraction. If you pour too gently, you will have a dense bed which will result in a very long extraction. If you pour too vigorously, you will create some channels in the bed which will result in a weak cup. You will need to experiment a little bit here to get a good balance.
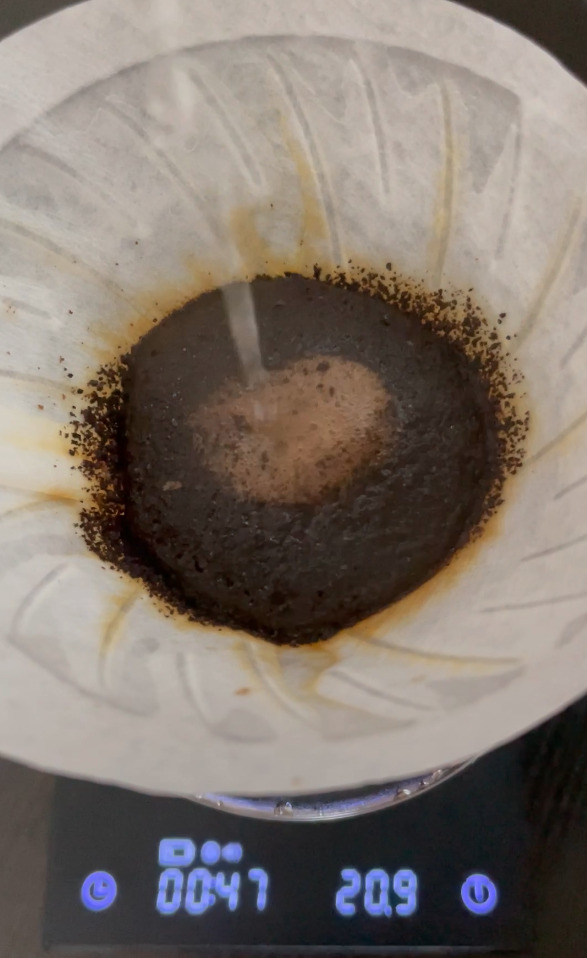
If you manage to pour 60% of your water by 1min 15sec, your cone should look something like this. In the next 30sec, slowly pour the rest of the water. The goal here is to roughly keep the water level steady. Having a sufficient amount of liquid in the cone will keep the slurry at a high enough temperature for good extraction.
Once you finish pouring, take a spoon and stir the top of the cone, once clockwise and once counter clock wise. You are trying to knock down any grounds stuck to the walls of the cone.
(You could skip over to the next step if you are brewing a small batch like me)
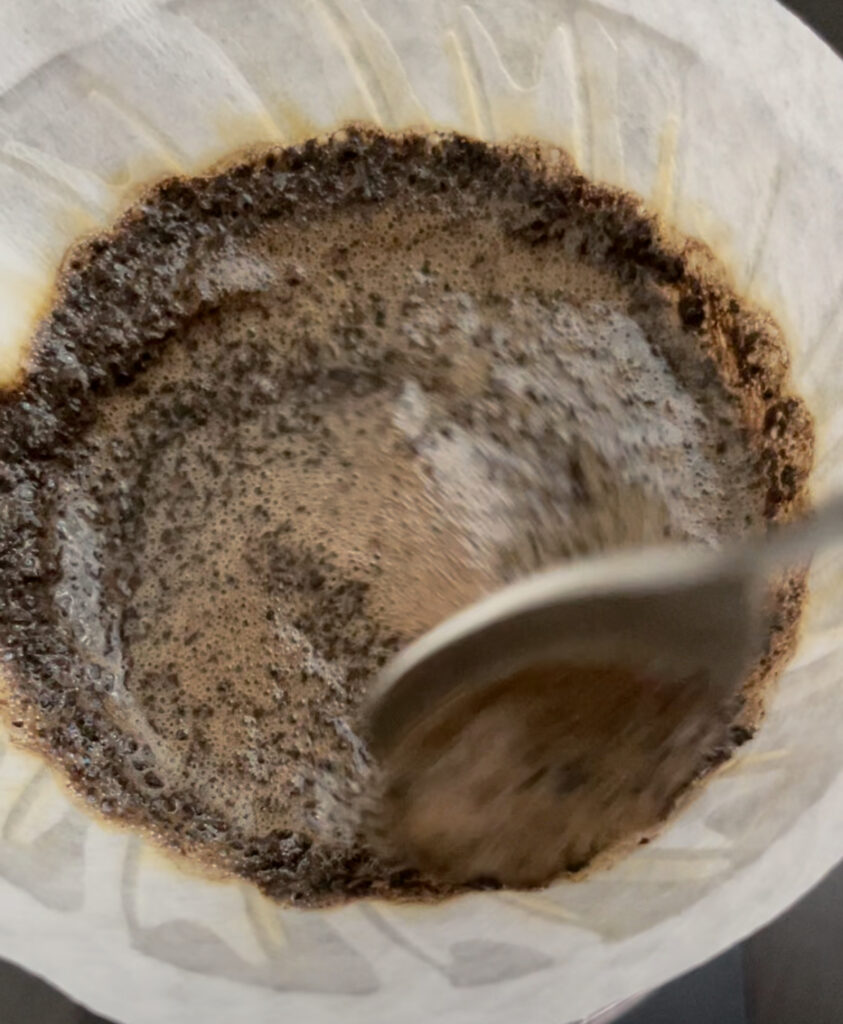
Once it seems safe to do so, lift the dripper and give it a swirl. Again this is to knock off the coffee grounds to get a flat bed of coffee at the end.
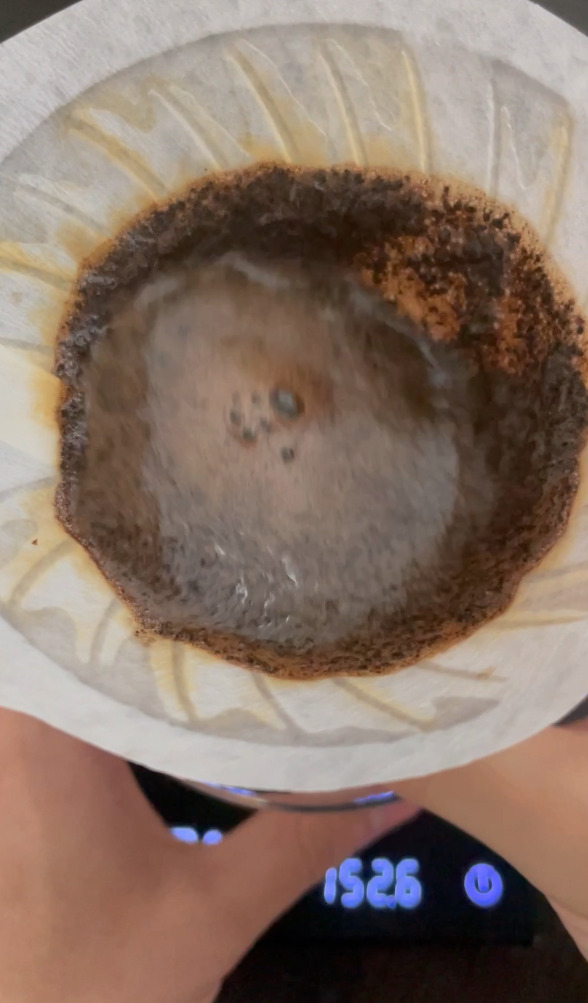
Wait for all the coffee to drip and we are done!
To adjust the taste of the coffee with this method, you use the grind size.
If your coffee tastes weak or lacking body or a bit too acidic, grind a bit finer. In general, you should keep pushing finer until you start getting a strong bitter harshness. At that point push back coarser one step.
The 4:6 Method by Tetsu Kasuya
The next method on the list is the 4:6 method. This method was developed by Tetsu Kasuya, the 2016 World Brewers Cup champion.
Tetsu explains this method himself in this video on the official HARIO YouTube channel.
The recommended ratio for this method is 300g of water to 20g of coffee. So I will be using 150g to 10g.
This method calls for a coarse grind size, roughly something you might use for a french press. In my case I added 4 clicks on my TIMEMORE SLIM PLUS grinder from the setting I used in the James Hoffman method.
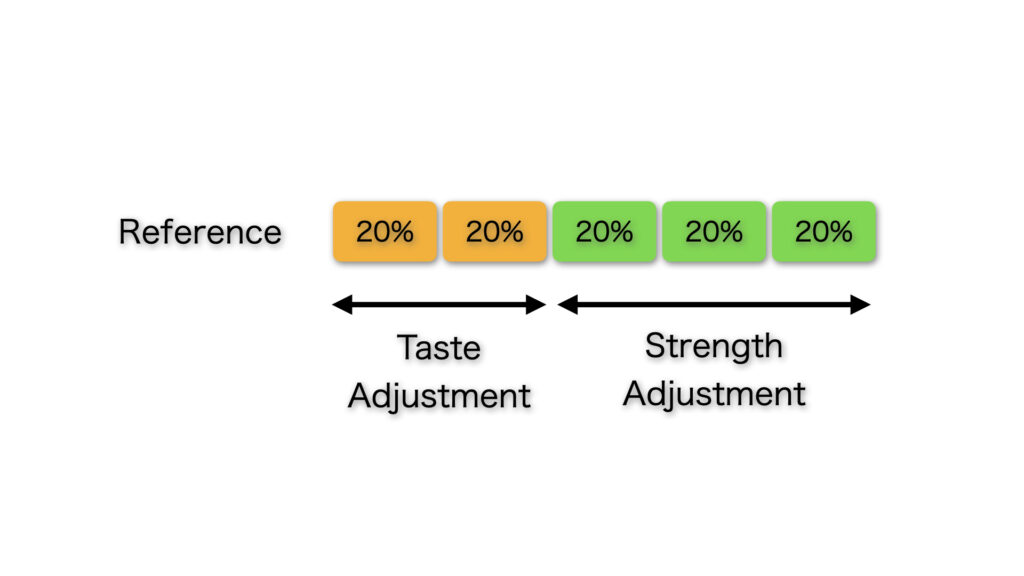
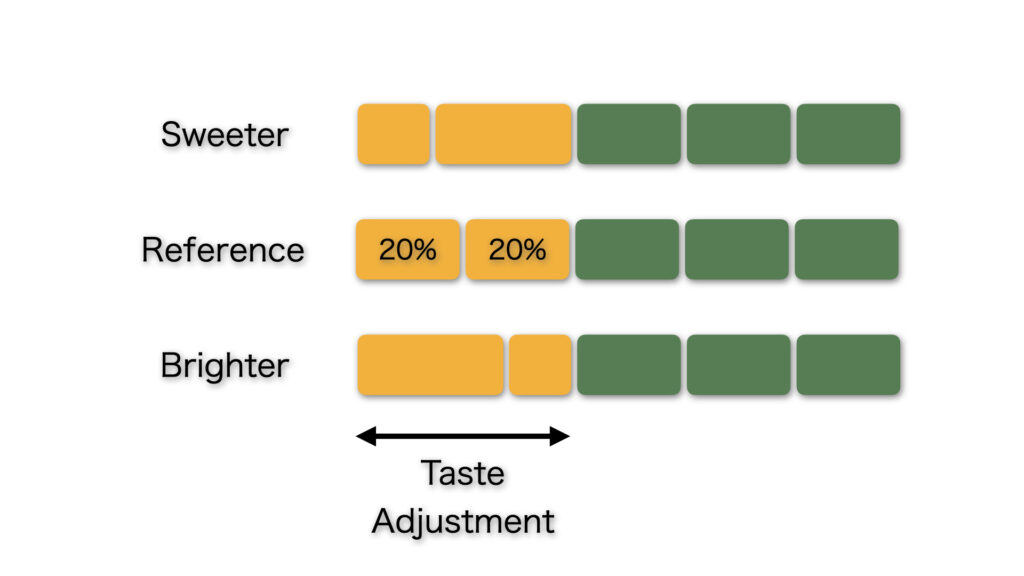
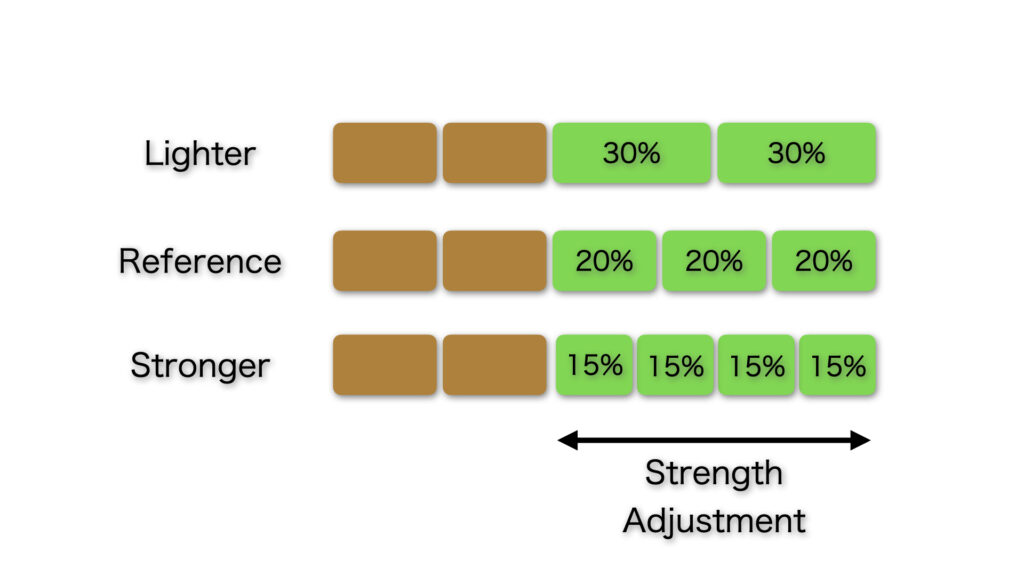
The name of the 4:6 method comes from the way method uses 40% of the water to adjust the taste of the coffee and the remaining 60% to adjust the strength of the coffee.
I used the basic adjustment for this method. In this adjustment you split the 150g of water into 5 parts, 30g each. You pour this 30g every 45sec. This is the unadjusted reference point way to use this method.
Set your filter in the cone and rinse it.
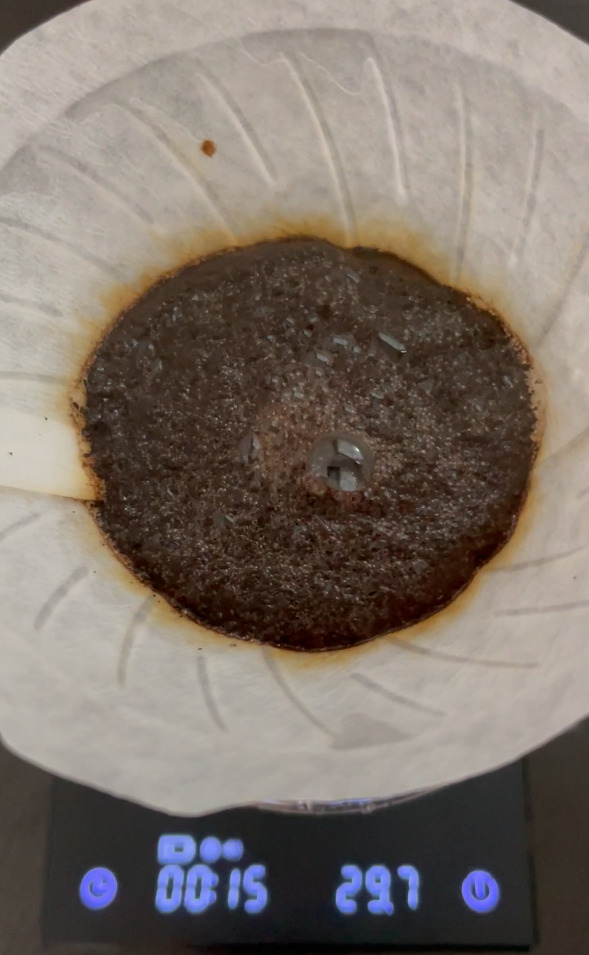
Once you put you put your grounds in the cone and zeroed your scale, start your timer and first pour. Pour 30g and wait for 45sec. Try to get all grounds wet. This is your bloom phase.
After the 45sec, pour another 30g, and again wait 45sec.
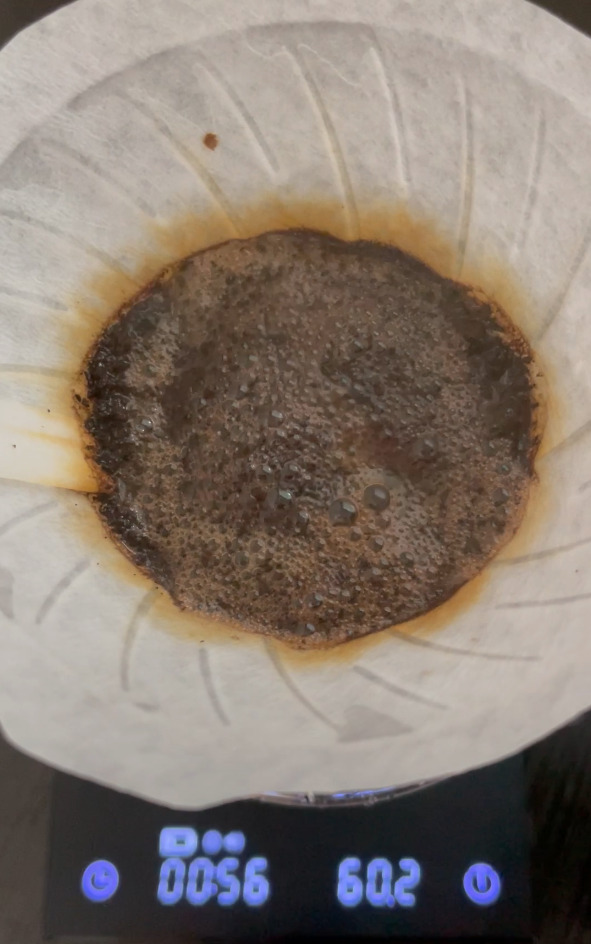
Repeat this for a total of 5 pours, and your coffee is ready!
You only pour 30g at once and 45sec is usually enough for the most of the water to fall through, so you never have a lot of water in the cone at one time. This is a very different approach from the James Hoffman method.
The explanation is very simple and easy to understand, so you may think that it would be easy to replicate. But this actually isn’t the case. You have to keep track of a few numbers at the simultaneously, and once you try it you quickly realize that this is a busy and tricky method.
For on thing, the 45sec interval is rather confusing; 45sec, 1min 30sec, 2min15sec, 3min. And while you are keeping track of time, just adding up 30g somehow becomes a bit tricky. Try it. I think you will understand what I mean. I messed up quite a few times.
Also as I mentioned, if you want to adjust with this method, it gets a lot more complicated.
To adjust your brew with this method, you use the first 40% of water for adjusting the taste, and the remaining 60% for adjusting the strength.
If you want a sweeter cup, reduce first pour, and increase the second. So for example, 20g then 40g, instead of the 30g then 30g with the reference. Conversely, if you are looking for a brighter, more acidic cup, go for 40g then 20g.
To adjust the strength, you change the number of pours for the latter 60% of water. For a lighter cup, pour the 60% in 2 pours, 30% each. For a stronger cup, use 4 pours each of15%.
It’s a very systematic method with a clear guidance on how to adjust your brew. But as I mentioned, it quickly gets pretty complicated. You would need some practice to get comfortable with this method.
Osmotic Flow Method
The final method I will share is commonly known as the Osmotic Flow Method outside of Japan. It’s actually a classic Japanese style of brewing where you form a dome from the coffee grounds and pour very very gently. So I actually like to call this the Japanese Dome method.
This method was the first way I was introduced to pour overs, and I was actually very surprised that its rarely used any where outside of Japan. This method does not have a clear developer since it has been used in Japan for a very long time. It seems to have its roots in how barista’s in Japanese style cafes dripped coffee using hand held cloth filters.
There was a YouTube video by CAFEC that made this method known outside of Japan recently, CAFEC is a Japanese coffee equipment maker. They called this method the Osmotic Flow method in their video, and that seems to be how this method came to be known by this name.
This method is very different from the previous two methods. The aim here is to keep the coffee grounds stable as much as possible. You don’t make a slurry in the typical sense where you get a mixture of water and coffee grounds. Here you try to form a dome out of the grounds and want to keep this dome intact through out the brew.
There was no ratio or grind size recommended in the CAFEC video. But people typically use medium fine grounds, and the ratio tends to be quite big. So I used the same grind setting as the James Hoffman method, and used a 100g to 10g ratio. You might want to use even more coffee beans, it will make it easier to keep the dome.
Like the other methods, set the filter in the cone and add your coffee. They do not rinse the paper in the CAFEC video. (It’s up to you, I rinsed it to keep it consistent with the other brews)
Shake the dripper a little to flatten the grounds and pour a bit of water to bloom the coffee. CAFEC does not even use a scale or timer with their brew. You need to watch how your grounds bloom and adjust. This is a key step in this method. You want the grounds to bloom up like a dome.
My personal trick is to leave a little bit of grounds dry at the edge of the cone. This will prevent the dome from collapsing. I used about 10g of water for the bloom.
The CO2 released will lift the the surface of the grounds in to a dome like shape. You may want to use darker roasts for this method.
After a 30sec bloom, start pouring very gently at the center. White fine bubbles will form where the water hits. This will expand the dome further. Stop before the dome cracks. Wait a bit for the dome to fall back down, then add a bit more. Continue this pulsing pour up to about 1/3 of the water (50g in my case).
Once you get to 1/3, start circling around the white bubbles with your pour. The aim here is to gradually expand the white bubble region. Make sure you don’t let the white bubbles run down to the edge of the cone.
Keep doing this until you hit the desired amount of water. The key is to get minimum agitation of the coffee grounds.
This method clearly requires a lot of patience and skill to pull off correctly. I, obviously lack both… My dome is not nearly clean as the one shown in CAFEC’s video. I need more practice.
This method is by far the most difficult method out of the 3 methods in terms of the skill required. Which I think is the most interesting part of this method. The more you practice, the better you will get.
I mentioned this before but its easier to do this method when you use more coffee.
Comparison
I plotted out the amount of water poured over time in each method. As you can see they have very different patterns.
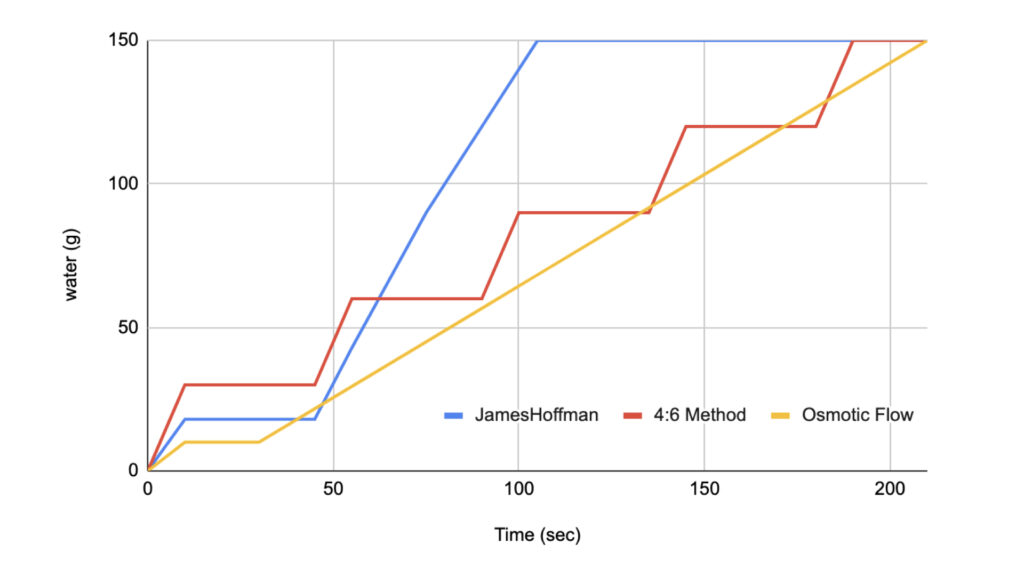
The James Hoffman method has the most water in the cone at one time. You get the wettest (is that even a word?) slurry. The 4:6 method is in the middle. You do get a slurry, but its get a lot less liquid. The Osmotic Flow method never has much water in the cone at a time. You don’t get a slurry, its more like you are passing water through a bed of coffee grounds, rather than mixing them togeter.
I compared the taste of the coffee brewed from each.
One thing I want to point out is that I have not mastered any of the 3 methods. And each method should be adjusted differently for the best result. So I really can’t say I got the best out of each method.
Out of the 3 cups, I felt that the James Hoffman method had the clearest taste. I used quite darkly roasted beans, so the coffee had a strong bitterness, but the after taste was clean and did not linger in a bad way. The 4:6 method was mild and kind of the middle brew of the 3. The Osmotic Flow method had the strongest bitterness and had the fullest body.
I would say that the James Hoffman method is the easiest to try, the next being the 4:6 method, and the Osmotic Flow being the most difficult. Which in reverse means that if you want to work on your skills, the Osmotic Flow method will offer you the greatest challenge.
As I mentioned, there is not correct or best method. Look and find what works for you.
How do you brew your pour overs? I would love to hear in the comments.

コメント